Required Materials
- Wood sheet 3mm thick
- CAD program (preferably SolidWorks)
- RDWorks software program
Material used
- 1500cm^2 Wood
- 12 min cutting/scanning time
Step 1 - Design using SolidWorks
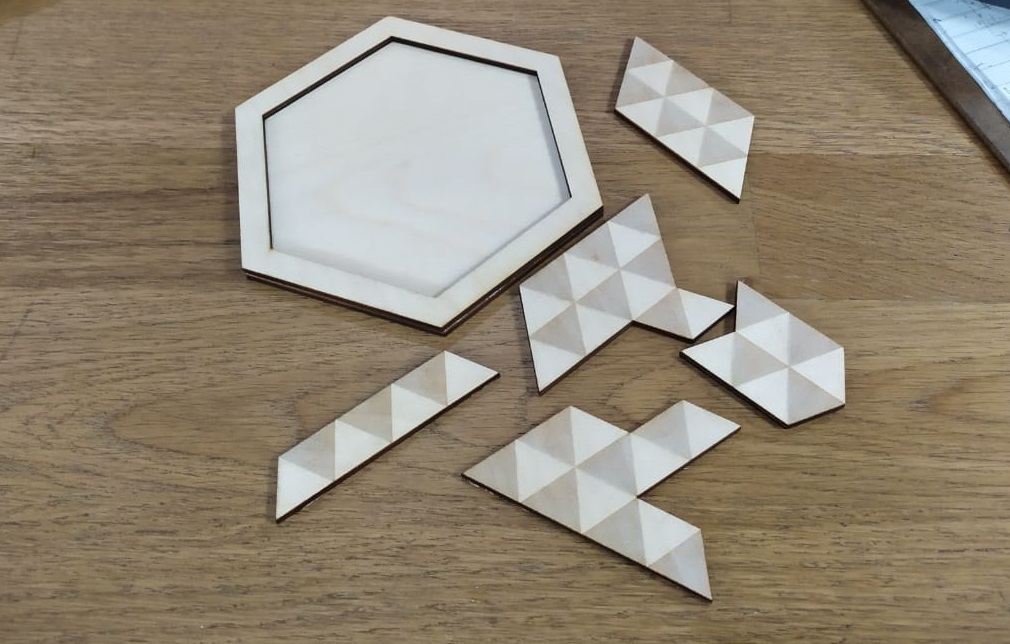
Feel free to skip and download the finished parts here .
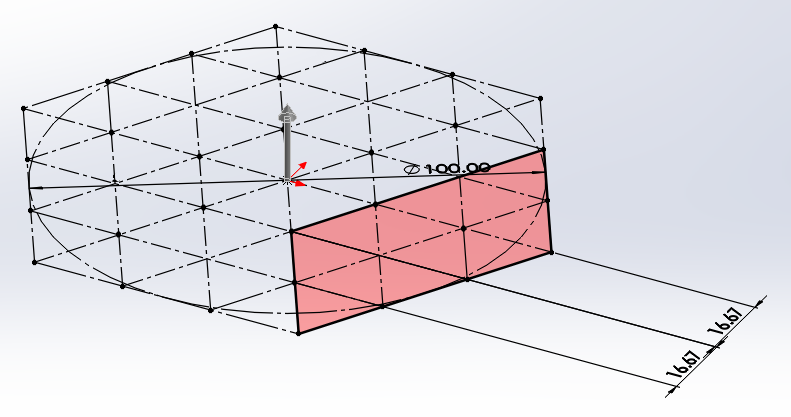
The Mold
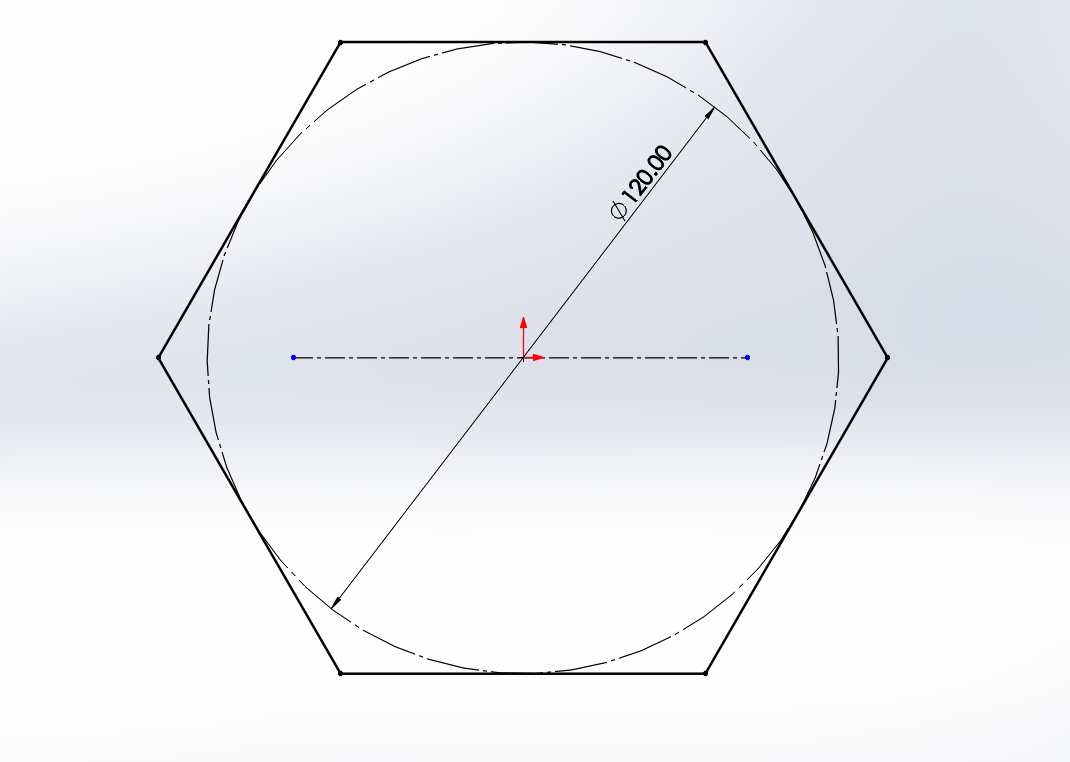
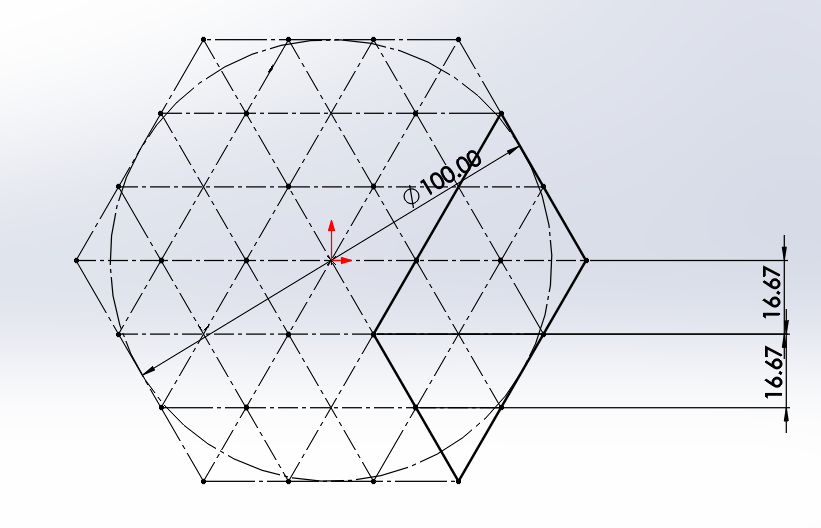
- Open sketch > select top plane to sketch on.
Draw polygon and add dimention as seen below.
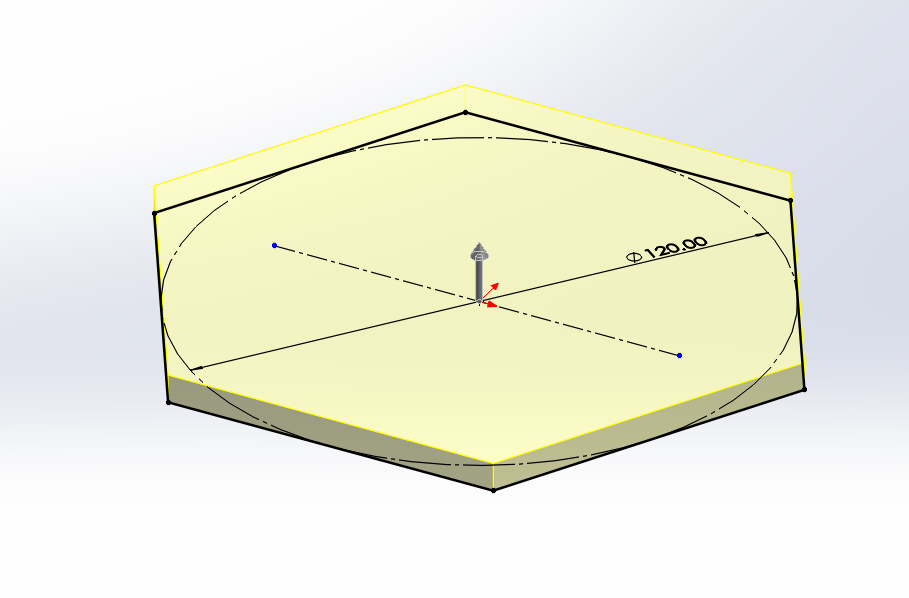
- Select Featueures > Extrueded Boss/Base.
On the left change dimension to dessired depth (here 6mm) then press ok.
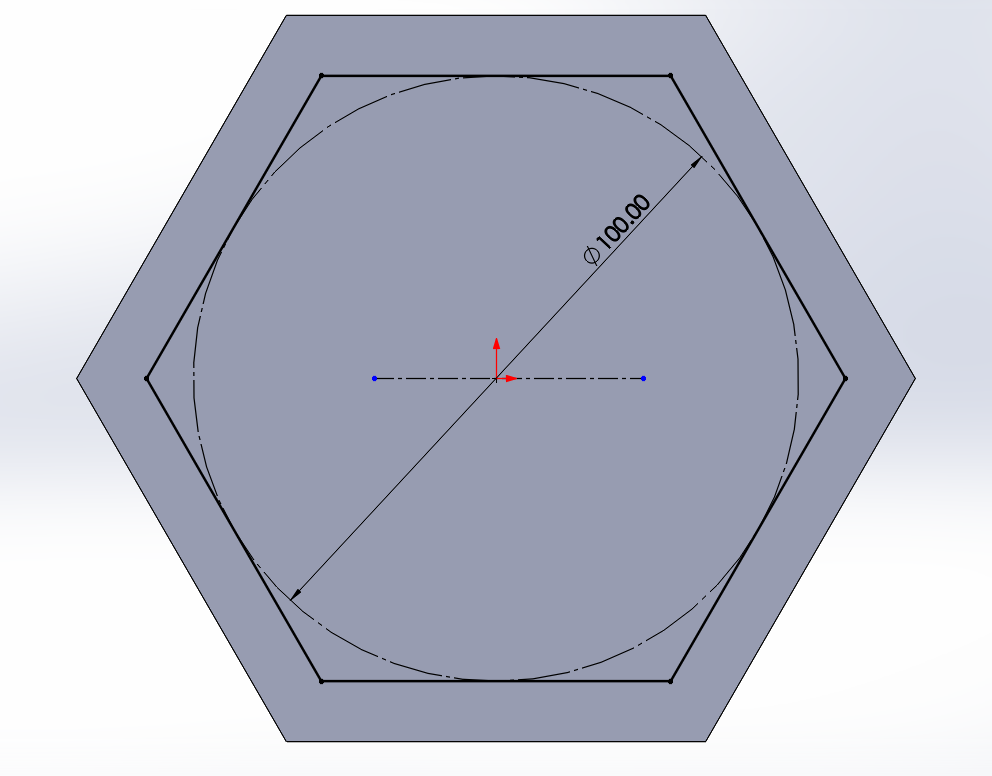
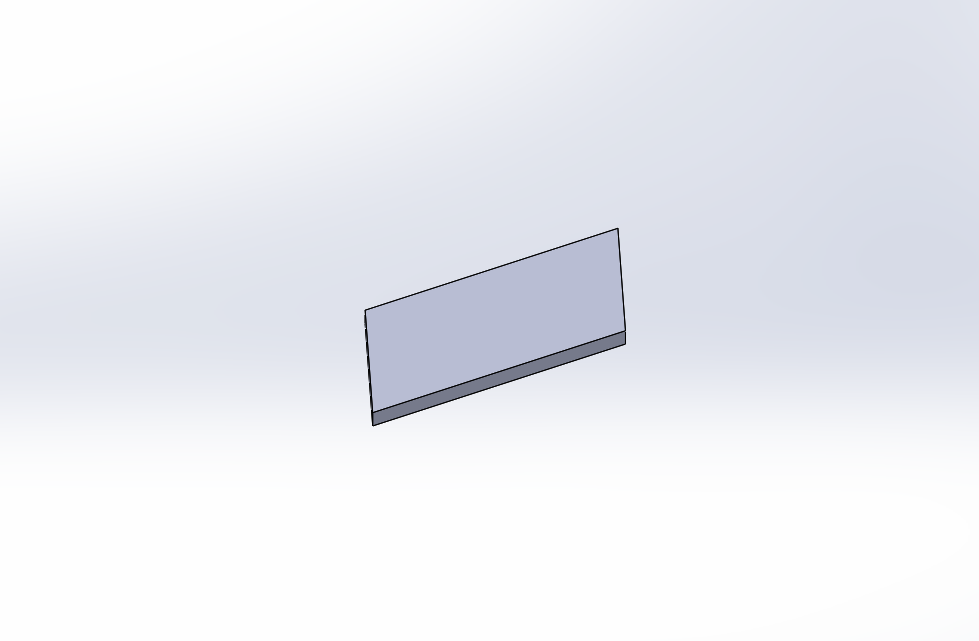
- Open another sketch > select the face of the part to sketch on.
Draw polygon and add dimention as seen below.
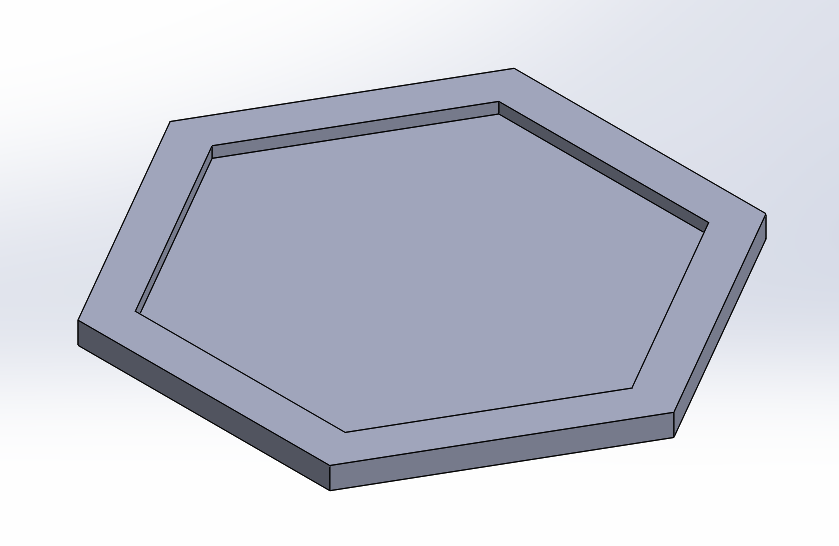
- Select Featueures > Extrueded Cut.
On the left change dimension to dessired depth of cut (here 3mm) then press ok.
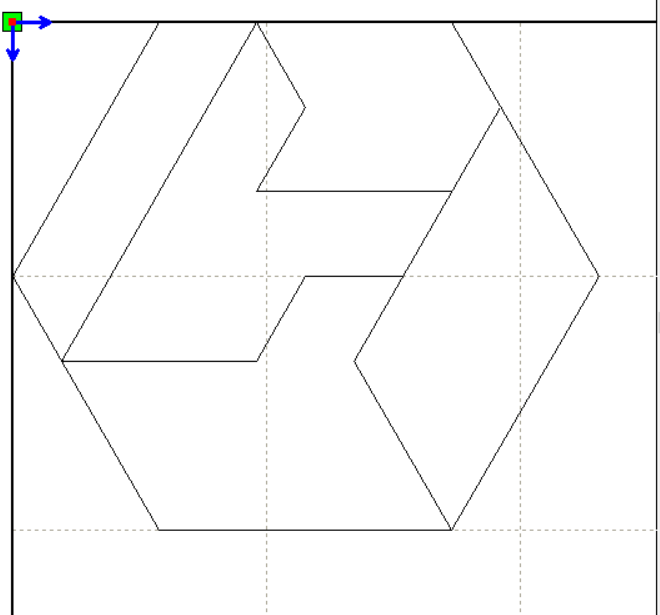
The Pieces
- Draw a piece on the grid (make sure it's a closed drawing)
- Select Featueures > Extrueded Boss/Base.
- On the left change dimension to dessired depth (here 3mm) then press ok.
To make the design of the pieces simpler and custamizable creat a grid first. You can download the grid here .
Now you can draw any pieces you want to using this grid
Step 2 - Setup for Lazer Machine
Note that you have to make sure that the scaning process is performed before the cutting! If not your project will have defectsLaser Parameter setting
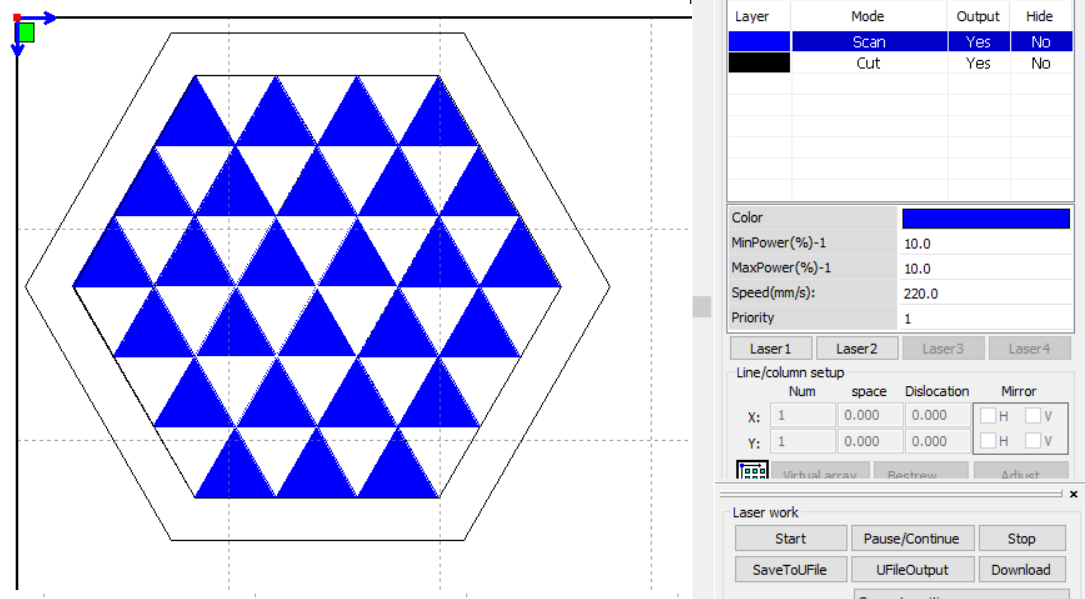
- For Scanning: Max Power is 10%, Min Power is 10%, Speed is 220 mm/s
- For Cutting: Max Power is 70%, Min Power is 70%, Speed is 25 mm/s
The process
- Save SLDPRT file as dxf/dwg
- Open Thunder Laser (RDWorks)
- Import the puzzle pieces and edit the "Cut" parameters to Min Power=70, Max Power=70 , Speed=25
- Click SaveToUFile button
- Copy the folder to the USB of the Laser cutting machine and insert it
- Open file in the display of the machine and copy it to memory
- Establish your origin and use "frame" button to make sure you have enough space
- Press Enter

- After step 3: Import the grid and over lap it with the puzzle pieces by alining them in the upper left corner
- Select onther color for the grid
- Right click on the cut option of this layer > change the process to "Scan" and edit parameters to Min Power=10, Max Power=10 , Speed=220
- Click SaveToUFile button
- Continue with steps 4 - 8
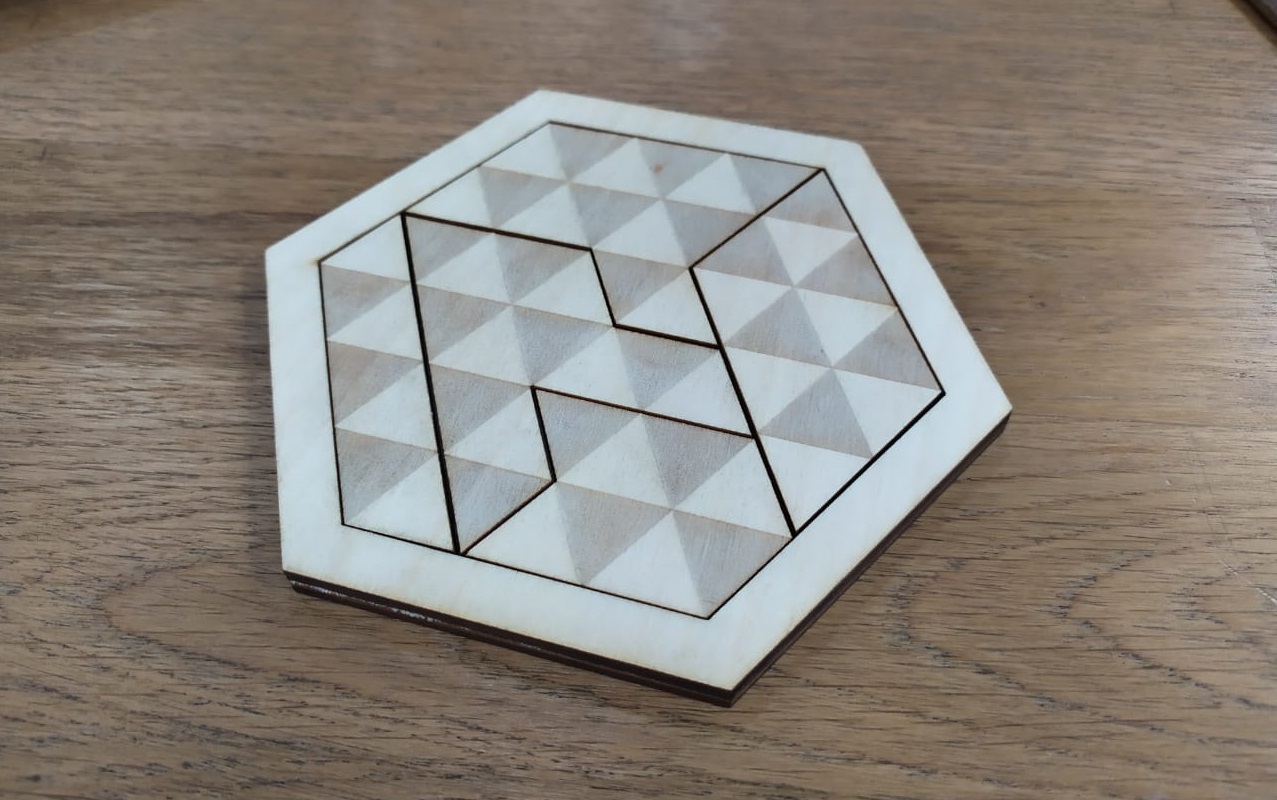
End result
Mini-Competition Result
| Contestant | Time |
|---|---|
| 🥇 Sarah | 35.00 sec |
| 🥈 Yahya | 36.65 sec |
| 🥉Mo2men | 51.11 sec |
🏅Participation Award🏅
- Anas
- Yousry
- Hannah